The world of mehndi is a captivating dance of intricate patterns and deep cultural roots, but for many, the sheer complexity can feel intimidating. Where does one even begin? The answer lies in the beautiful simplicity of a mehndi design easy and beautiful. This approachable art form is revolutionizing how we interact with this ancient tradition, making it accessible to everyone, regardless of skill level.
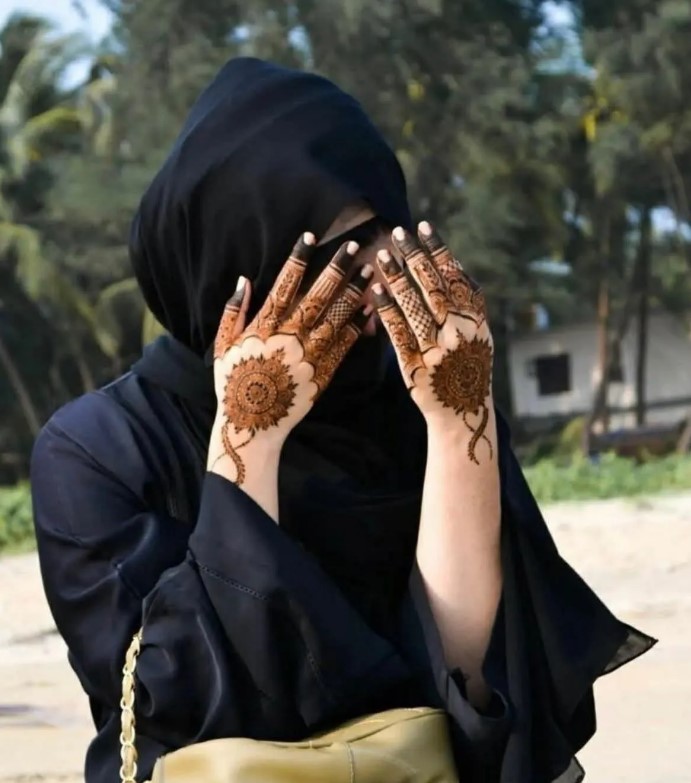
Forget the pressure of creating elaborate, full-hand masterpieces; the true magic often resides in a single, elegantly drawn flower on the wrist or a delicate line tracing the collarbone. These designs prove that you don’t need to be a professional artist to adorn your body with something meaningful and stunning. The goal is to embrace the joy of creation, to experience the calming ritual of application, and to wear a piece of art that is uniquely yours.
“Mehndi is not about covering the skin, but about revealing the soul’s simple desire for beauty. This ancient art form, with a history detailed on Wikipedia, shows us that each easy design tells a story of accessible elegance.”
This journey into finding a mehndi design easy and beautiful is about more than just aesthetics; it’s about mindfulness, personal expression, and connecting with a global tradition in a manageable way. It’s for the student who wants a subtle accent for a party, the busy professional seeking a moment of creative calm, or the parent looking for a fun activity with their child. The rise of this trend speaks to a universal desire for art that fits into modern life—quick to apply, simple to master, yet profoundly beautiful.
In this ultimate guide, we will walk you through everything you need to know. From the rich history of mehndi to the latest 2025 trends, from a foolproof step-by-step guide to common pitfalls you must avoid, we will equip you with the knowledge and confidence to create your own beautiful designs. Prepare to discover that the most stunning mehndi design easy and beautiful is often the one you create with your own hands.
What Defines an Easy and Beautiful Mehndi Design?
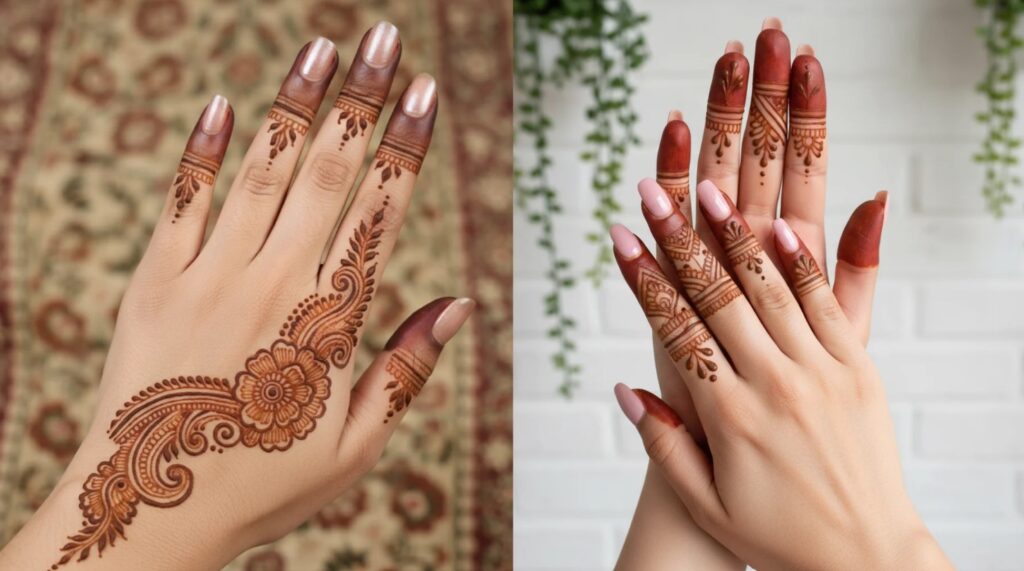
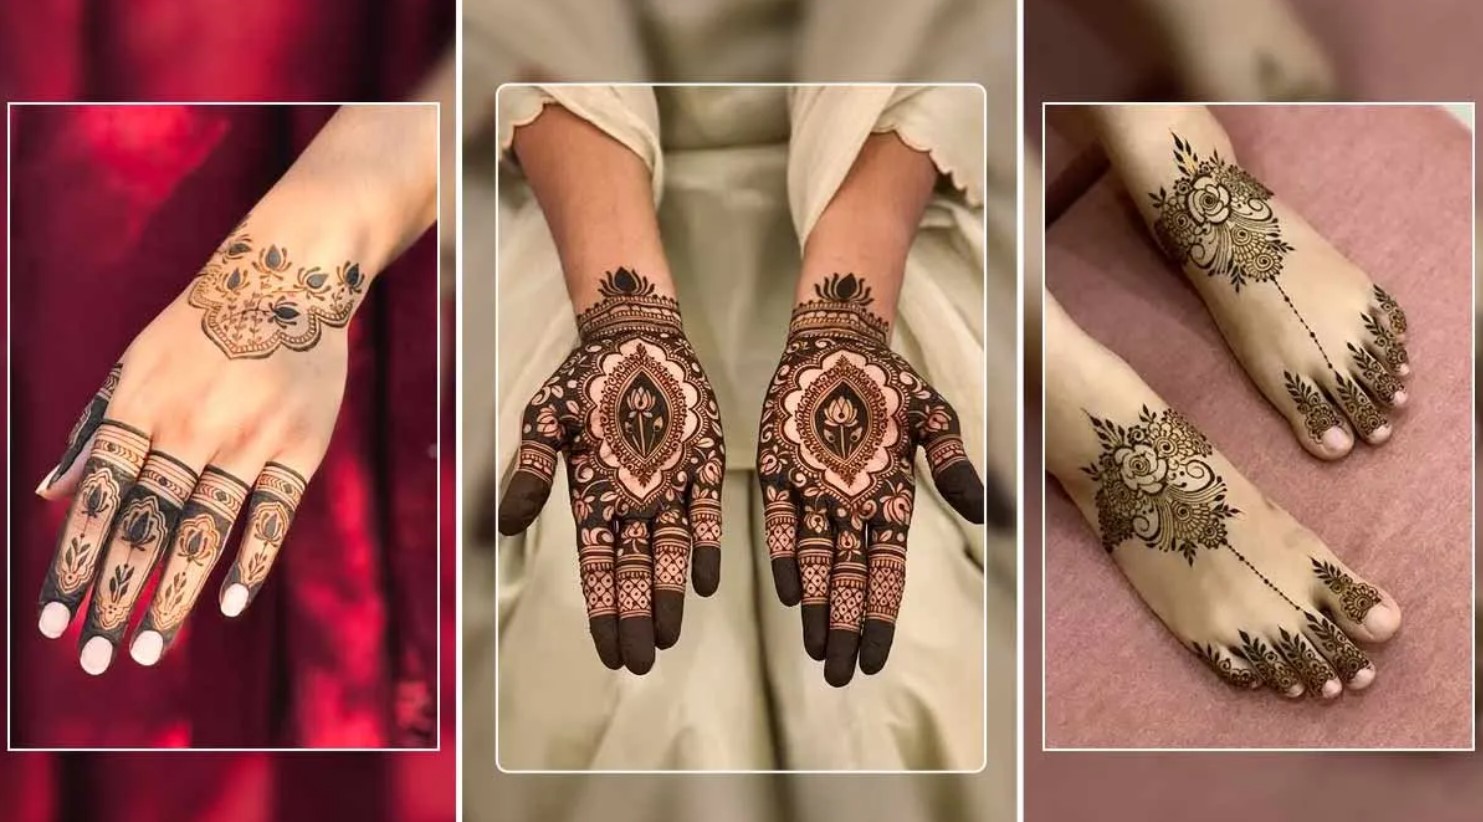
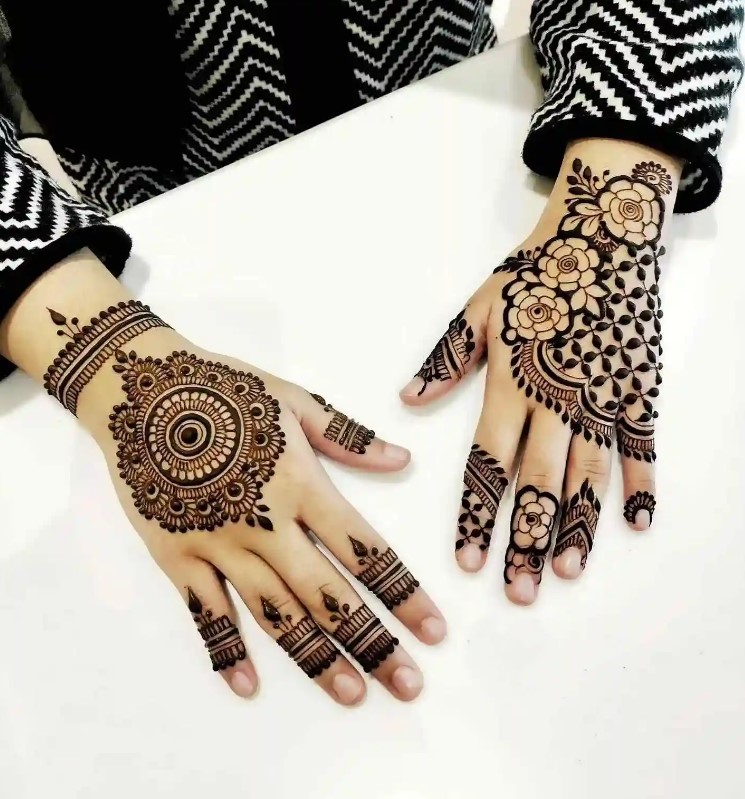
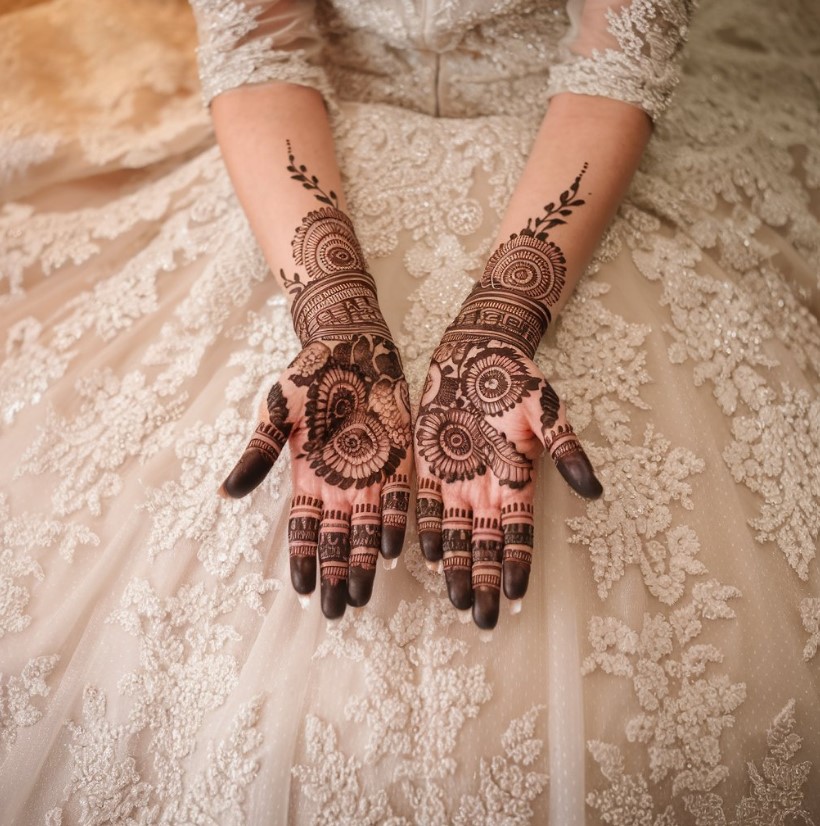
A mehndi design easy and beautiful is characterized by its simplicity, minimalism, and focus on clean lines. Unlike traditional bridal patterns that cover large areas with dense, complex motifs, an easy design prioritizes readability and effortless execution. The beauty comes not from overwhelming detail, but from strategic placement, pleasing shapes, and the confidence of a well-drawn line. These designs are typically composed of basic elements that are easy to practice and replicate.
Key features include the use of simple shapes like dots, lines, circles, and basic teardrops. A mehndi design easy and beautiful often avoids heavy shading or intricate fillings, instead leveraging negative space to create elegance. The placement is also crucial; these designs shine on smaller canvases like the fingers, the side of the palm, the wrist, or the ankle. The ultimate test of an easy and beautiful pattern is whether a beginner can draw it with reasonable accuracy after a few practice sessions on paper, resulting in a tattoo design that feels personal and chic.
A Glimpse into the History of Mehndi
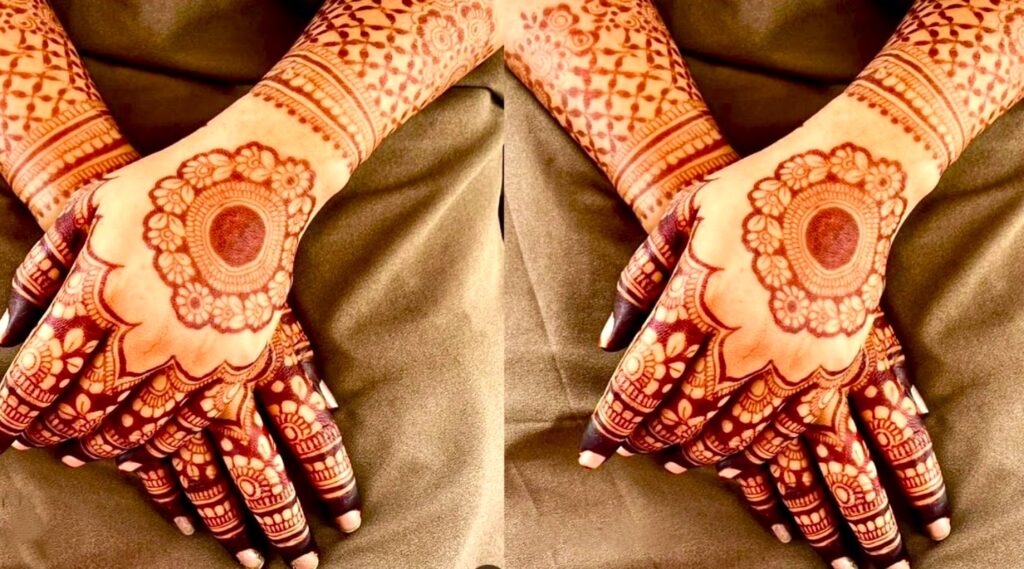
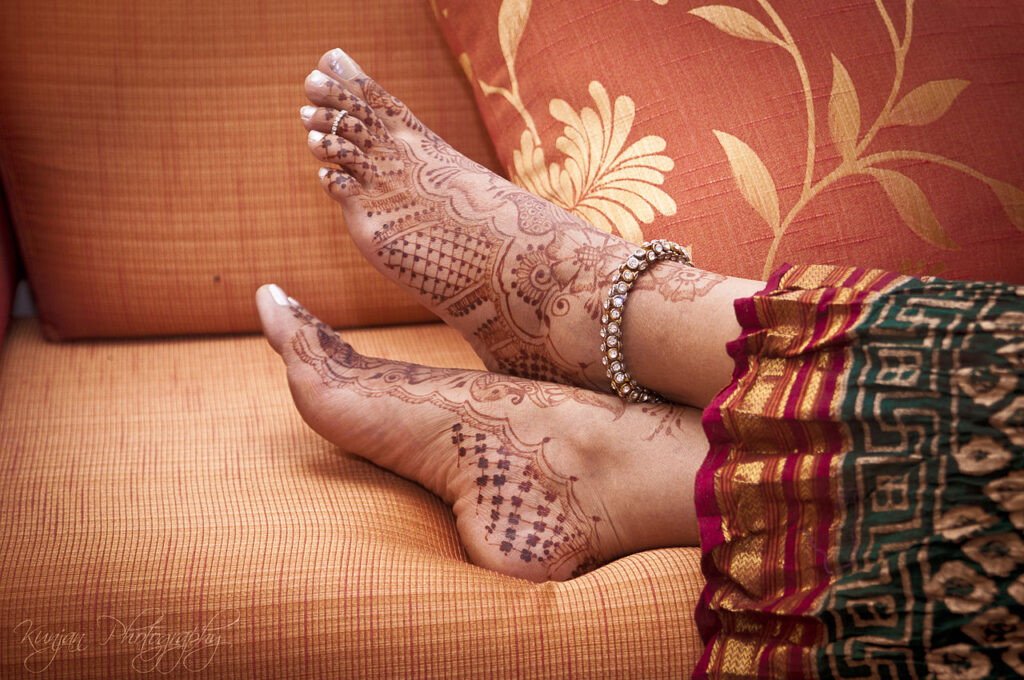
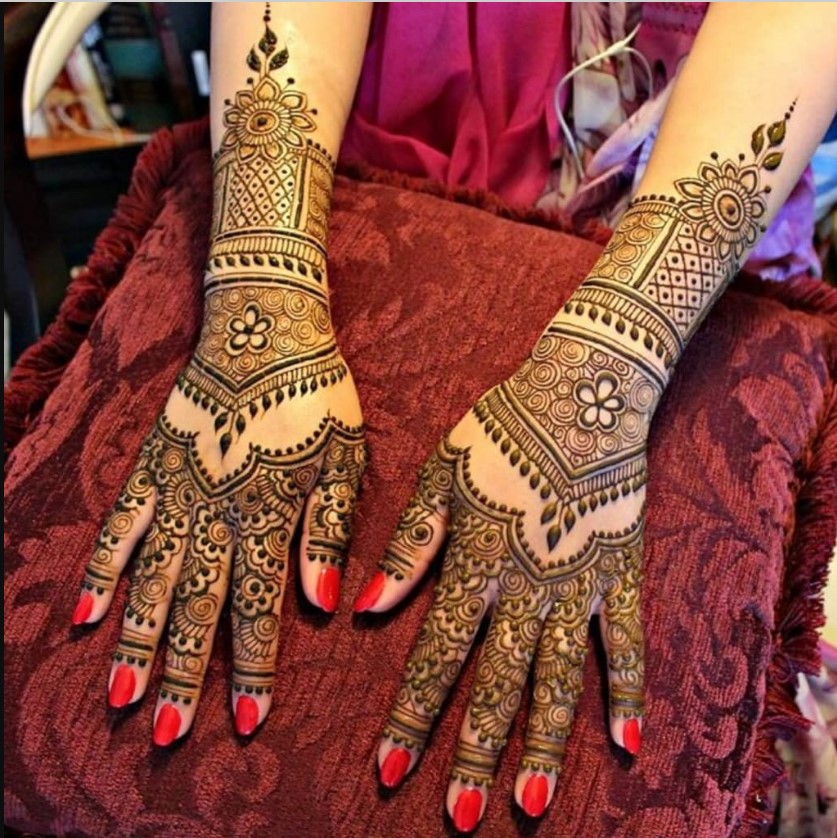
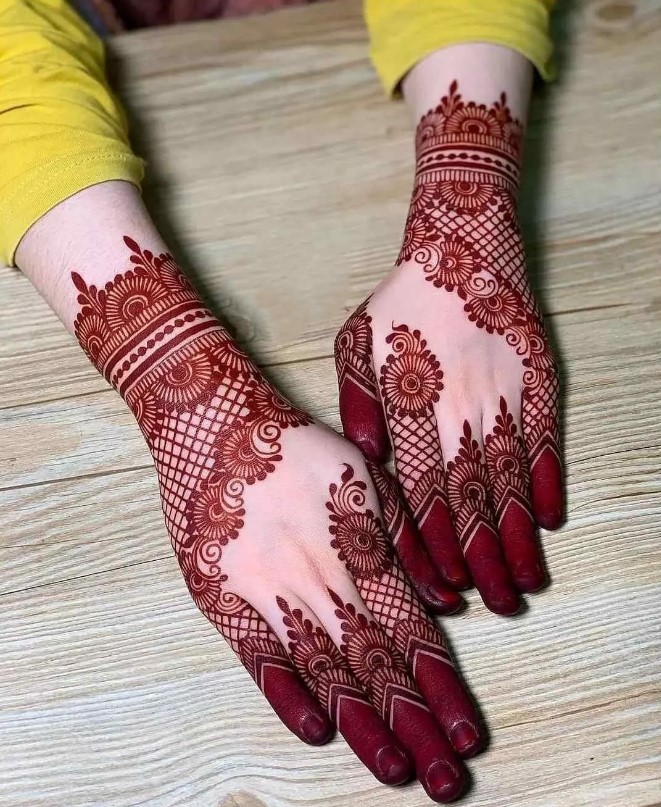
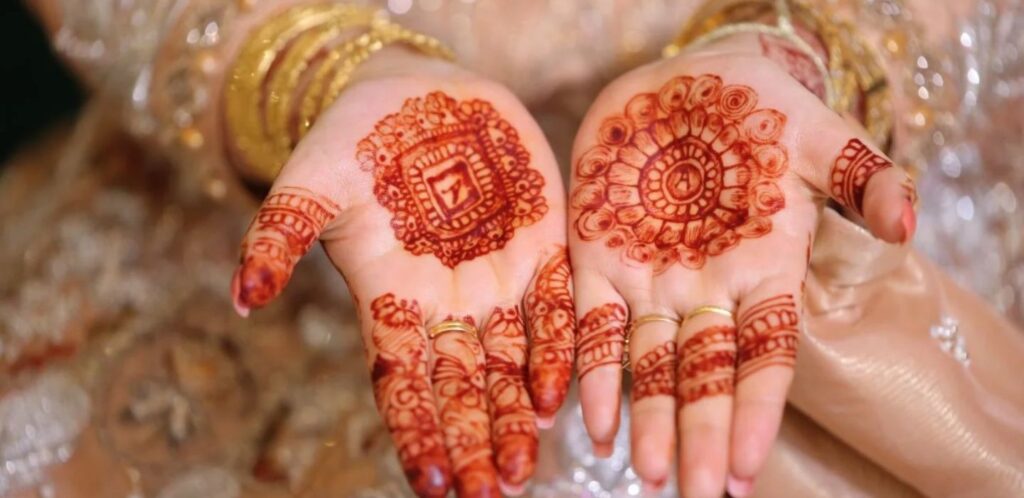
The story of mehndi is a tapestry woven across continents and centuries. Its origins can be traced back over 5,000 years to ancient Egypt, where evidence suggests Cleopatra herself used henna for adornment. The plant also has deep roots in ancient India and the Middle East, valued not only for its decorative properties but also for its natural cooling effect on the skin. Historically, the application of mehndi was deeply intertwined with cultural and spiritual ceremonies, most significantly in South Asian and Middle Eastern weddings.
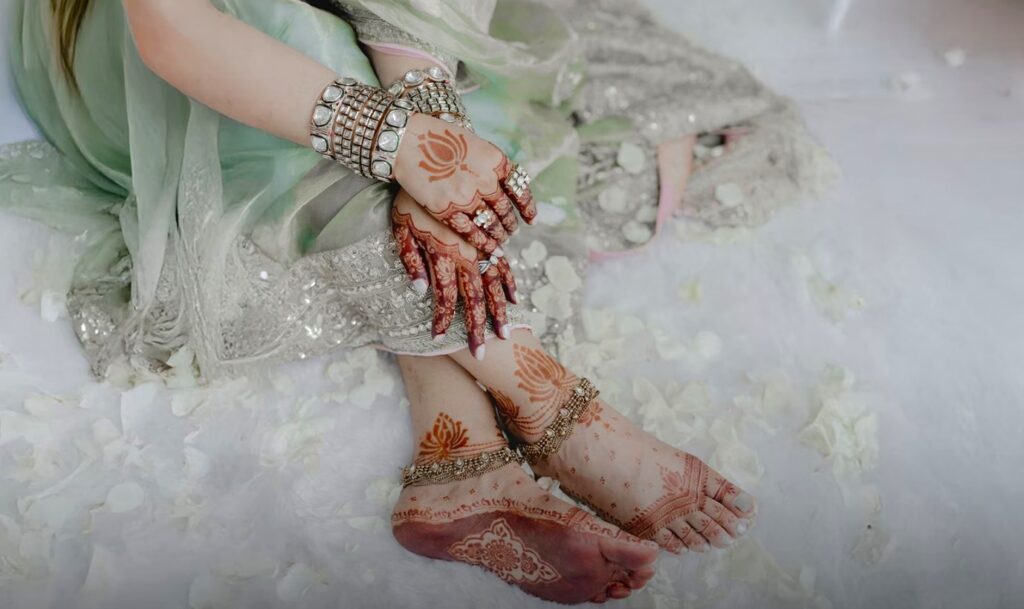
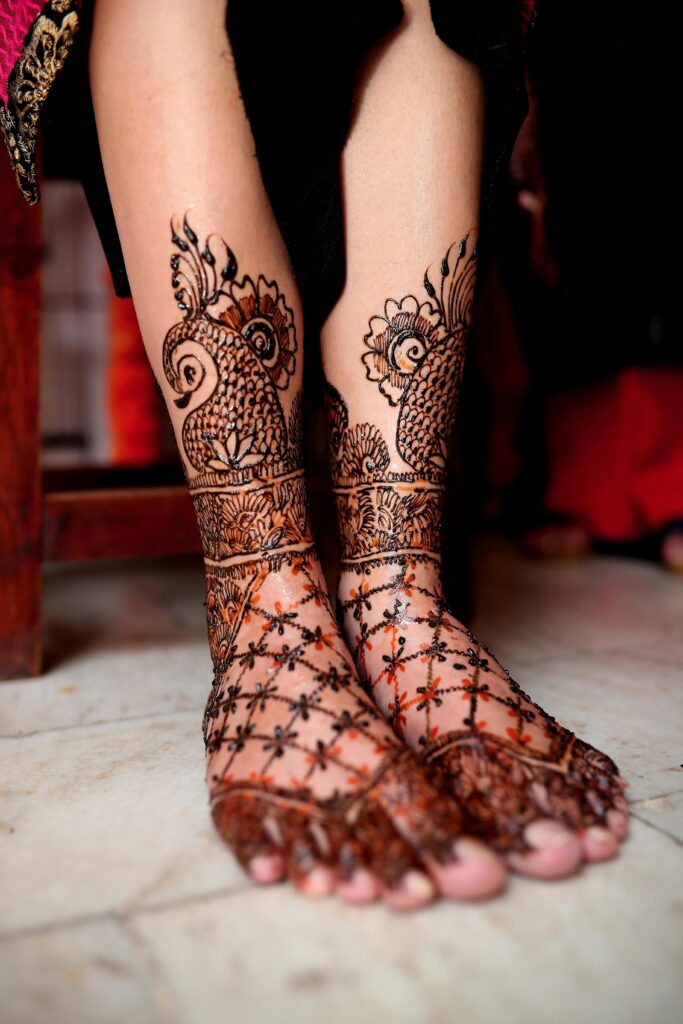
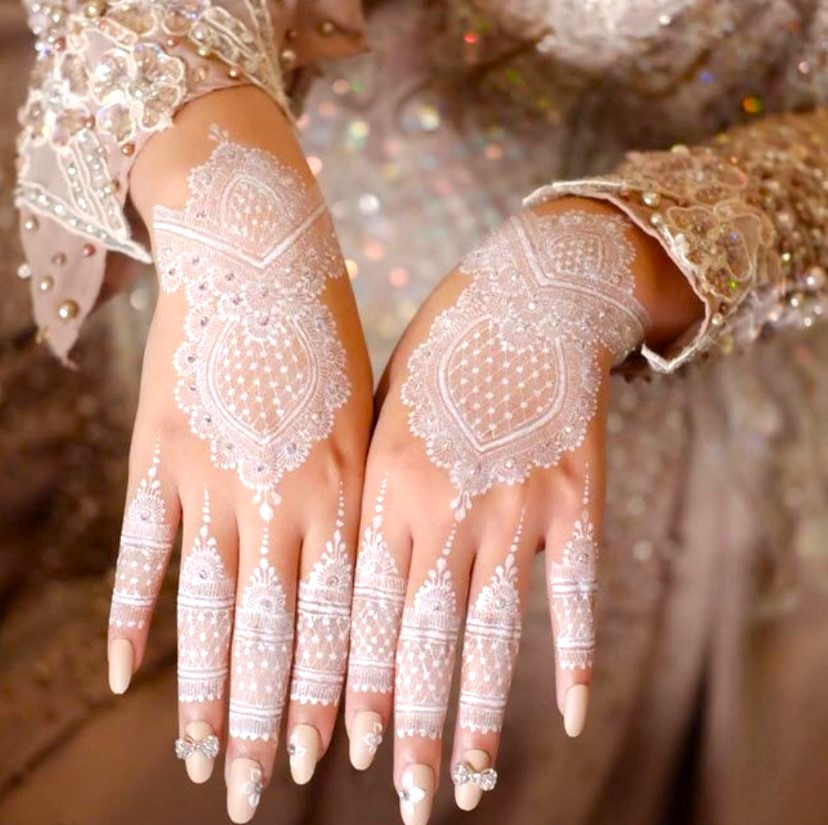
In these traditions, mehndi nights are vibrant pre-wedding festivities where the bride’s hands and feet are adorned with elaborate patterns symbolizing joy, beauty, and protection. The journey from these grand, symbolic applications to the modern pursuit of a mehndi design easy and beautiful is a testament to the art form’s adaptability. As mehndi spread globally, it evolved to suit new contexts. People began to appreciate the art outside of ceremonial confines, leading to a demand for simpler, more versatile designs that could be worn daily. This cultural fusion gave birth to the minimalist trends we see today.
The Importance of Simple Mehndi in the Modern World
In our fast-paced lives, the appeal of a mehndi design easy and beautiful is stronger than ever. Its importance lies in its ability to democratize a beautiful art form. Not everyone has the time, resources, or skill for a 5-hour application, but almost anyone can find 10 minutes to draw a lovely pattern. This accessibility fosters cultural appreciation, allowing people from all backgrounds to participate in and respect the art without appropriating its deepest ceremonial significances.
Furthermore, creating a simple mehndi design easy and beautiful is an act of mindfulness. The focus required to draw the lines can be a form of meditation, providing a creative escape from daily stress. It’s also a fantastic way to experiment with body art without the permanence of a tattoo. For many, it serves as a “test run” for a potential permanent tattoo design, offering a glimpse of how art looks on their skin. This blend of art, therapy, and personal expression makes simple mehndi profoundly relevant today.
Top 2025 Trends for Easy and Beautiful Mehndi Designs
The world of mehndi is constantly innovating. The trends for 2025 are all about personalization, simplicity, and clever use of space. Here’s what’s emerging:
1. Single-Line Motifs and Continuous Flow Designs
Artists are creating stunning pieces with a single, unbroken line. Think of a vine that starts at the wrist and curls up the finger, or a minimalist animal silhouette drawn without lifting the cone. This trend is challenging but offers a incredibly modern and elegant look for a mehndi design easy and beautiful.
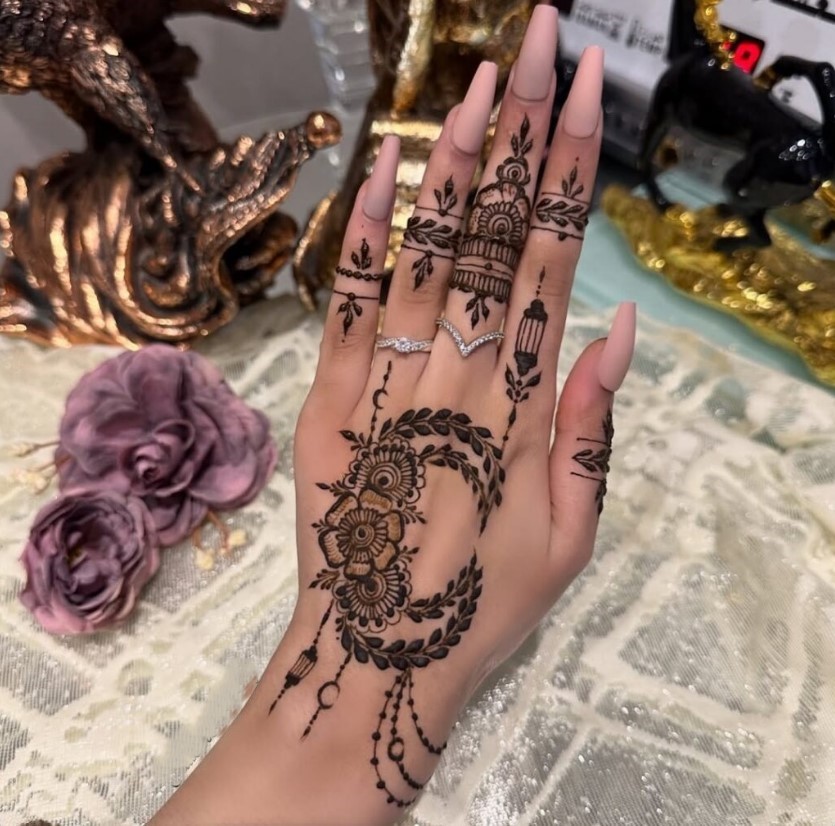
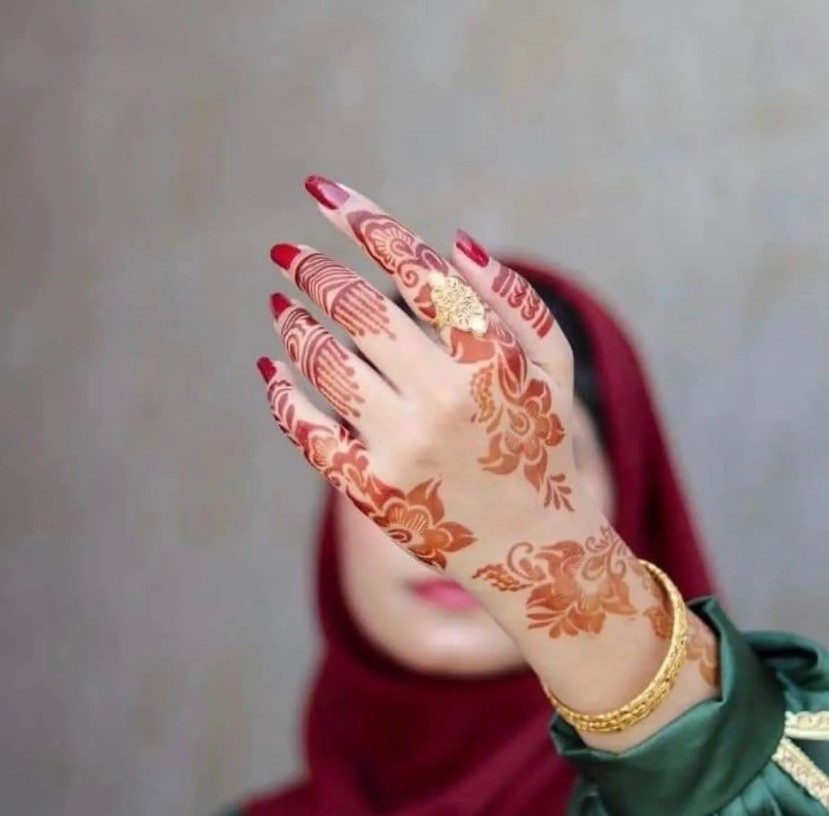
2. Micro-Florals and Isolated Blooms
Instead of sprawling gardens, the trend is towards tiny, perfectly formed single flowers or leaves placed strategically. A small bloom on the mid-finger, or a trio of leaves on the side of the thumb, makes a delicate statement. This is perhaps the easiest trend for beginners to adopt.
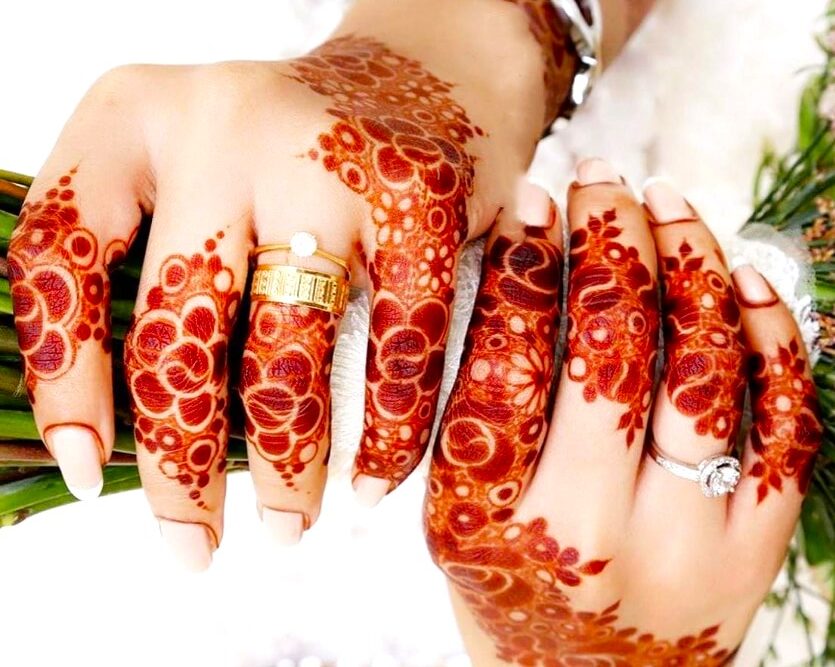
3. Negative Space and Geometric Patterns
This trend uses the skin as part of the design. Simple triangles, squares, or mandalas are outlined with henna, and parts are left unfilled. This creates a striking visual contrast and a very contemporary feel, perfect for a modern tattoo design aesthetic.
4. Personalized Initials and Symbols
Integrating initials, astrological signs, or other meaningful symbols into a simple mehndi pattern is huge for 2025. It transforms the design from a generic pattern into a personal talisman, making your mehndi design easy and beautiful uniquely yours.
Your Step-by-Step Guide to Creating a Stunning Mehndi Design
Follow this beginner-friendly guide to achieve perfect results every time.
Step 1: Gather Your High-Quality Materials
You will need a few key items. The most important is a fresh, natural henna cone. Avoid “black henna” at all costs, as it contains harmful chemicals. You’ll also need medical tape for a better grip, lemon juice mixed with sugar for sealing, cotton balls, and eucalyptus or tea tree oil.
Step 2: Prepare Your Canvas (Your Skin)
Start with clean, dry skin. Wash the area with soap and water to remove any oils, lotions, or dirt. Do not apply moisturizer beforehand. For a darker stain, you can gently exfoliate the area a few hours before application.
Step 3: Practice the Design on Paper
Never start directly on your skin! Practice your chosen mehndi design easy and beautiful on a piece of paper first. This helps you get a feel for the pressure needed and allows you to perfect the pattern’s flow. Confidence on paper translates to confidence on skin.
Step 4: The Application Technique
Hold the cone like a pen. Apply gentle, even pressure, starting with a small dot on your skin to get the paste flowing. Draw from the center of your design outward to avoid smudging. Keep your hand steady and move the cone smoothly for clean lines.
Step 5: Mastering Aftercare for a Dark Stain
Once the design is complete, let it dry completely. To darken the stain, apply a lemon-sugar mixture over the dried paste. Let the paste sit for 4-6 hours. Once it cracks, gently scrape it off. Avoid water on the design for the next 12-24 hours for the richest color.
The Benefits and Drawbacks of Simple Mehndi Art
Benefits:
- Low Commitment & Cost-Effective: As a temporary art, it allows for frequent change. A single cone can create many designs.
- Quick Application and Drying Time: Most easy designs take minutes to apply and dry much faster than full-hand patterns.
- Painless and Natural: Henna is a safe, plant-based paste, making the process completely pain-free.
- Boosts Creativity and Confidence: Successfully creating a beautiful design provides a great sense of accomplishment.
- Perfect for All Occasions: Its subtlety makes it suitable for work, casual outings, or special events.
Drawbacks:
- Short Lifespan: The stain typically lasts 1-2 weeks, fading gradually.
- Allergy Risk with Fake Products: Using impure henna can cause severe reactions. Always patch test.
- Requires Steady Hand: While easier than complex designs, a steady hand is still needed for clean lines.
- Fading Can Be Uneven: The stain may fade faster on areas with more friction, like the palms.
Expert Tips for a Flawless Mehndi Experience
To elevate your results, follow these pro tips. First, always conduct a patch test. Apply a small dot of henna on your inner arm and wait 24 hours to check for any allergic reaction. Second, control the temperature. Henna stains best on warm skin. You can gently warm the area before applying and keep it warm afterward.
Third, master the basic elements. Practice making consistent dots, straight lines, and smooth curves on paper. These are the building blocks of every mehndi design easy and beautiful. Fourth, seal the deal. After removing the dried paste, apply a thin layer of eucalyptus or clove oil over the stain several times a day. This will deepen the color and make it last longer.
Finding Inspiration for Your Next Design
Inspiration is everywhere! Social media platforms like Pinterest and Instagram are goldmines. Search for hashtags like #SimpleMehndi, #EasyHenna, or #MiniMehndi. Nature is the ultimate inspiration—look at the veins of a leaf, the petals of a flower, or the wings of a butterfly.
Everyday objects can spark ideas. The pattern on a piece of lace, the design of a wrought-iron gate, or the shape of a piece of jewelry can be translated into a lovely mehndi design easy and beautiful. Even children’s coloring books often have simple, bold shapes that are perfect for adapting into mehndi patterns.
Common Beginner Mistakes and How to Avoid Them
Avoiding these common errors will ensure a much better experience. Using artificial black henna is the most dangerous mistake. It contains PPD and can cause severe skin reactions. Always use natural, brown henna. Applying on oily or dirty skin will result in a pale, patchy stain because the paste cannot adhere properly.
Rushing the application leads to shaky lines and smudging. Take a deep breath and work slowly. Touching the design while it’s wet is a surefire way to ruin it. Be patient and let it dry completely. Finally, washing the area too soon after the paste comes off will wash away the developing stain. Wait at least 12 hours before letting water soak the design.
The Future Scope of Easy Mehndi Art
The future of easy mehndi is bright and intertwined with technology. We can expect to see Augmented Reality (AR) apps that allow users to “try on” different designs using their phone’s camera before applying the real thing. The development of new, safe formulas for colored henna (like safe blues and greens) will expand the creative palette.
The DIY trend will grow with more sophisticated home kits that include stencils, practice sheets, and high-quality cones. Furthermore, mehndi application may be recognized for its therapeutic benefits, being incorporated into art therapy for mindfulness and stress relief. The core principle will remain: making the joy of mehndi accessible to all through easy and beautiful designs.
Frequently Asked Questions (FAQs)
1. What is the easiest Mehndi Design Easy and Beautiful for a complete beginner?
Start with basic shapes like dots, dashes, and simple flowers. A line of dots along the finger bones or a single flower on the wrist is a perfect, easy and beautiful mehndi design for your first try. Practice on paper first to build confidence.
2. How can I make my mehndi stain darker and last longer?
For a dark stain, keep the paste on for 4-6 hours. Apply a sugar-lemon sealant and keep the area warm. After removing the paste, avoid water for 12-24 hours and apply eucalyptus or clove oil several times a day to lock in the color.
3. Is it safe to use “black henna” for a quick, easy mehndi design?
No, it is extremely unsafe. Authentic natural henna is always brown-orange. “Black henna” contains a chemical called PPD that can cause severe allergic reactions, blisters, and permanent scarring. Always use 100% natural henna.
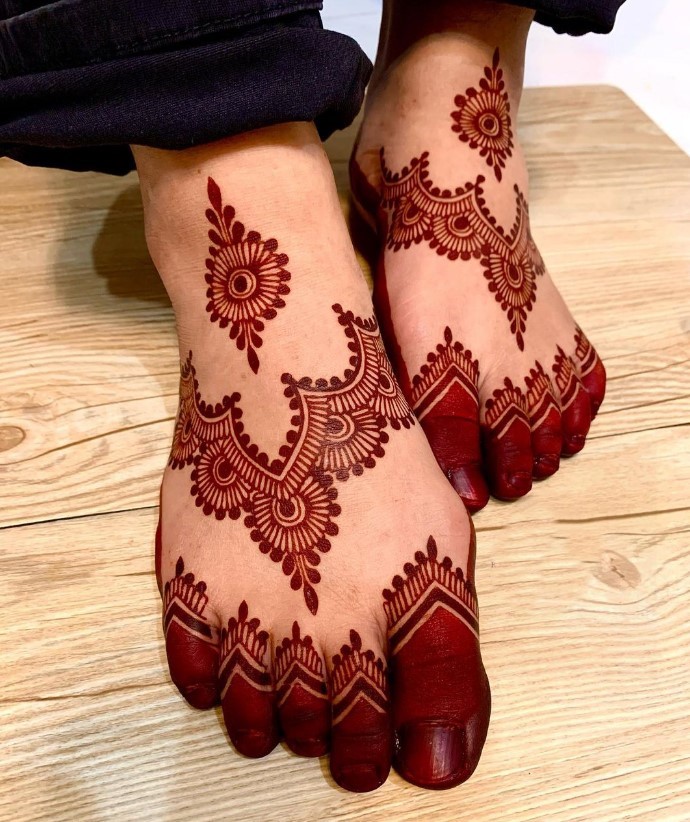
4. Where is the best place on the body to apply a simple mehndi design?
The palms and soles stain the darkest, but for visibility, the top of the hands, wrists, fingers, and ankles are ideal. For a discreet design, try the collarbone, back of the neck, or behind the ear.
5. How long does an easy mehndi design typically last?
A well-applied and cared-for design can last 1 to 3 weeks. The duration depends on the skin location, your skin type, and how well you follow aftercare instructions. Areas with more friction will fade faster.
6. Can I create a mehndi design if I’m not good at drawing?
Absolutely! You can use stencils or stamps designed for henna. Trace a design using a transfer method, or start with very basic patterns like lines and dots. The goal is to have fun and create something you love.
7. What is the difference between mehndi and a permanent tattoo design?
Mehndi is a temporary dye that stains the skin’s top layers, fading naturally in weeks. It is painless and natural. A permanent tattoo involves injecting ink deep into the skin with a needle, which is permanent and painful.
8. How do I remove a mehndi stain if I make a mistake?
You cannot remove it instantly, but you can exfoliate it away faster. Gently scrubbing the area with an exfoliating glove or a paste of baking soda and lemon juice will speed up the fading process.
9. Where can I find inspiration for mehndi design easy and beautiful?
Look on Pinterest, Instagram, and YouTube. Search for terms like “simple mehndi,” “minimalist henna,” or “beginner mehndi.” Nature and geometric patterns are also great sources of inspiration for a tattoo design.
10. What are the basic supplies I need to start with mehndi at home?
You only need a few things: a cone of 100% natural henna, some paper for practice, and lemon juice mixed with sugar for aftercare. As you progress, you might want to invest in stencils or different cone tips.
“Inspired? Dive Deeper! Read our ultimate guide to Traditional Bridal Mehndi Designs.“